一、项目介绍
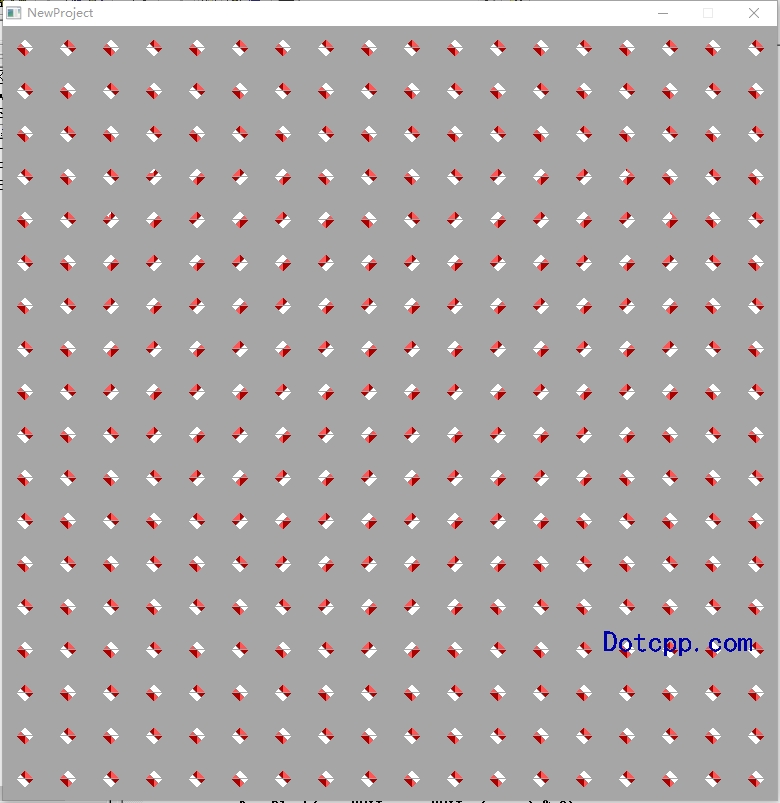
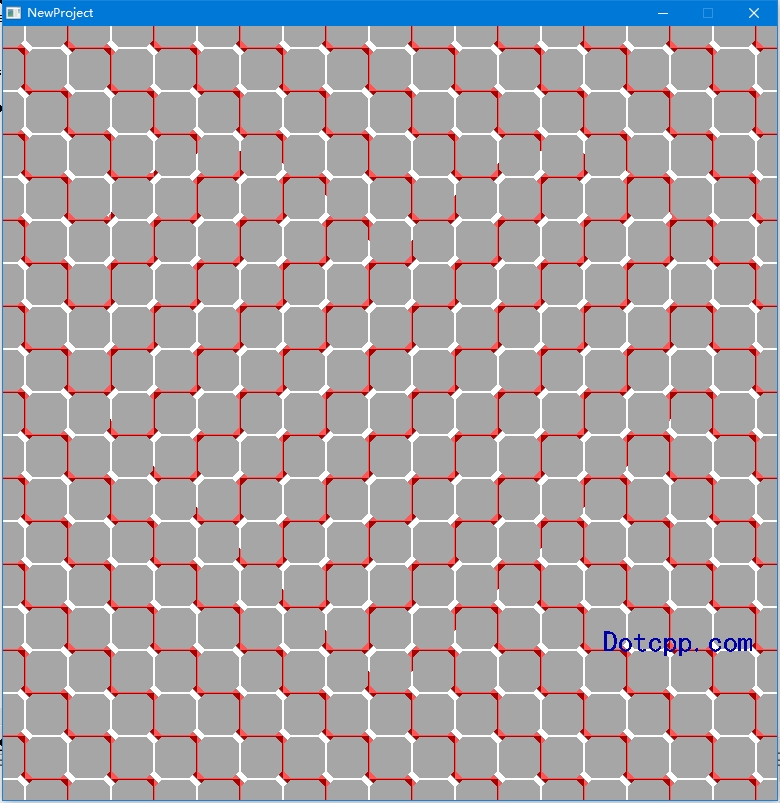
这是一个用C语言绘制的静态立体图形,但是一直盯住你就会发现图形中间有一颗心在隐隐跳动!
眼见不一定为实,你也会被自己的大脑“欺骗”。
编译环境:visual c++ 6.0
第三方库:Easyx2022 注意需要提前安装easyX,如没有基础可以先了解easyX图形编程
二、运行截图

(添加折线前)

(添加折线后)
三、代码思路
1.引入easyx头文件
1 | #include <easyx.h> |
2.创建绘图窗口
1 2 3 | initgraph(774, 774);setbkcolor(0xa6a6a6);cleardevice(); |
3.绘制背景
1 2 3 4 5 | setorigin(387 - UNIT / 2, 387 - UNIT / 2);for (int x = -9; x <= 9; x++)for (int y = -9; y <= 9; y++)DrawBlock(x * UNIT, y * UNIT, (x + y) % 2);setorigin(0, 0); |
4.画辅助图
1 2 3 4 | IMAGE img(774, 774);SetWorkingImage(&img);setbkcolor(BLACK);cleardevice(); |
5.画心(只需画左半侧)
1 2 3 4 5 | POINT ps[4] = { 387, 236, 321, 167, 129, 419, 387, 666 };setfillcolor(WHITE);solidpolygon(ps, 4);solidellipse(76, 124, 368, 456);SetWorkingImage(NULL); |
6.根据辅助图,将辅助图中白色部分与右侧颠倒
1 2 3 4 5 6 7 8 9 10 11 | DWORD* ref = GetImageBuffer(&img);DWORD* bk = GetImageBuffer(NULL);int t;for (int y = 0; y < 774; y++)for (int x = 0; x < 774 / 2; x++)if (ref[y * 774 + x] != BLACK){t = bk[y * 774 + x];bk[y * 774 + x] = bk[y * 774 + 774 - x];bk[y * 774 + 774 - x] = t;} |
完成
四、完整源码
1 2 3 4 5 6 7 8 9 10 11 12 13 14 15 16 17 18 19 20 21 22 23 24 25 26 27 28 29 30 31 32 33 34 35 36 37 38 39 40 41 42 43 44 45 46 47 48 49 50 51 52 53 54 55 56 57 58 59 60 61 62 63 64 65 66 67 68 69 70 71 72 73 74 75 76 77 78 79 80 81 82 83 84 85 86 87 | #include <graphics.h> #include <conio.h>#include <easyx.h>#include <stdio.h>const int UNIT = 43;///画背景单元方格///void DrawBlock(int x, int y, bool odd){int c1, c2;if (odd) { c1 = RED; c2 = WHITE; }else { c1 = WHITE; c2 = LIGHTRED; }setlinecolor(c1);line(x, y, x + UNIT - 1, y);line(x + UNIT - 1, y, x + UNIT - 1, y + UNIT - 1);setlinecolor(c2);line(x, y, x , y + UNIT - 1);line(x, y + UNIT - 1, x + UNIT - 1, y + UNIT - 1);setfillcolor(c1);POINT ps[3] = {x, y, x + 8, y, x, y + 8}; // 左上solidpolygon(ps, 3);ps[0].x = x + UNIT;ps[0].y = y; // 右上ps[1].x = ps[0].x - 8;ps[1].y = ps[0].y;ps[2].x = ps[0].x;ps[2].y = ps[0].y + 8;solidpolygon(ps, 3);ps[0].x = x + UNIT;ps[0].y = y + UNIT - 1; // 右下ps[1].x = ps[0].x - 8;ps[1].y = ps[0].y;ps[2].x = ps[0].x;ps[2].y = ps[0].y - 8;solidpolygon(ps, 3);setfillcolor(c2);ps[0].x = x;ps[0].y = y; // 左上ps[1].x = ps[0].x + 4;ps[1].y = ps[0].y + 4;ps[2].x = ps[0].x;ps[2].y = ps[0].y + 8;solidpolygon(ps, 3);ps[0].x = x + UNIT;ps[0].y = y + UNIT - 1; // 右下ps[1].x = ps[0].x - 8;ps[1].y = ps[0].y;ps[2].x = ps[0].x - 4;ps[2].y = ps[0].y - 4;solidpolygon(ps, 3);ps[0].x = x;ps[0].y = y + UNIT - 1; // 左下ps[1].x = ps[0].x + 8;ps[1].y = ps[0].y;ps[2].x = ps[0].x;ps[2].y = ps[0].y - 8;solidpolygon(ps, 3);setlinecolor(0x888888);line(x, y, x + 3, y + 3);line(x + UNIT - 1, y + UNIT - 1, x + UNIT - 4, y + UNIT - 4);}int main(){initgraph(774, 774);// 创建图形窗口setbkcolor(0xa6a6a6);cleardevice();///画背景///setorigin(387 - UNIT / 2, 387 - UNIT / 2);for (int x = -9; x <= 9; x++)for (int y = -9; y <= 9; y++)DrawBlock(x * UNIT, y * UNIT, (x + y) % 2);setorigin(0, 0);///画辅助图///IMAGE img(774, 774);SetWorkingImage(&img);setbkcolor(BLACK);cleardevice();///画心(只需画左半侧)///POINT ps[4] = { 387, 236, 321, 167, 129, 419, 387, 666 };setfillcolor(WHITE);solidpolygon(ps, 4);solidellipse(76, 124, 368, 456);SetWorkingImage(NULL);///根据辅助图,将辅助图中白色部分与右侧颠倒///DWORD* ref = GetImageBuffer(&img);DWORD* bk = GetImageBuffer(NULL);int t;for (int y = 0; y < 774; y++)for (int x = 0; x < 774 / 2; x++)if (ref[y * 774 + x] != BLACK){t = bk[y * 774 + x];bk[y * 774 + x] = bk[y * 774 + 774 - x];bk[y * 774 + 774 - x] = t;} setcolor(BLUE); setbkmode(TRANSPARENT);settextstyle(30,0,"楷体");outtextxy(600, 600, "Dotcpp.com");_getch();closegraph();return 0;} |
C语言网提供由在职研发工程师或ACM蓝桥杯竞赛优秀选手录制的视频教程,并配有习题和答疑,点击了解:
一点编程也不会写的:零基础C语言学练课程
解决困扰你多年的C语言疑难杂症特性的C语言进阶课程
从零到写出一个爬虫的Python编程课程
只会语法写不出代码?手把手带你写100个编程真题的编程百练课程
信息学奥赛或C++选手的 必学C++课程
蓝桥杯ACM、信息学奥赛的必学课程:算法竞赛课入门课程
手把手讲解近五年真题的蓝桥杯辅导课程